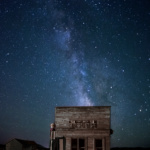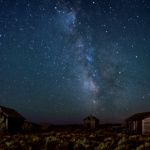
Fort Rock Night Photography – After a drive from my home here on the south side of Mount Hood to Central Oregon for some Fort Rock Night Photography. I and my friend Rob arrived at the Fort Rock Museum, what’s left of the history of this little town, and the geologic feature it’s named for. It was a little after midnight when we arrived. The old buildings at the museum were our goal for the evening, although it was our third stop on the two day trip, and we were excited at our chances at photographing the Milky Way in the sky above.
As a photographer I understand that, no matter how much I try to prepare it seems that there’s always some sort of unforeseen situation that pops up. In this case the complication came in the form of a huge invasive orange street light illuminating the scene. This actually created two complications. The street light created a huge range of light from the buildings to the dark sky which wouldn’t allow a longer exposure which is required to allow the sky to be exposed properly. When the sky was exposed properly the buildings were overexposed and vice versa. The second complication being the hot orange white balance of the light. Sodium lights produce a very narrow spectrum of light, meaning that it’s basically a monochrome image, kind of like a black and white but orange. No other color is represented and so it’s near impossible to correct for this type of light. To say the least I was a bit disappointed. Never one to just give up I decided to shoot the area nonetheless.
After we were done at Fort Rock we wrapped up the trip with a sunrise at the Christmas Valley Sand Dunes. It was a long trip with no sleep but an excellent adventure. We returned with photos from Smith Rock, Sparks Lake, Fort Rock and Christmas Valley all in a matter of about 24 hours.
Once home and after downloading my photos the realization that all of my photos from Fort Rock were affected by the aforementioned sodium street light started to sink in.

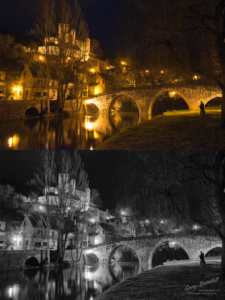
I’ve had to photograph under sodium lighting in the past but I just rolled with it, either that or I converted them to black and white. Many of the photos that I made in France were under this same orange light. In this case I didn’t want to roll with it. I wanted to take some time and process the photos into the images that I drove so far to create. I had to decide what approach that I would take.
While I was at the location I decided to take two photos for each final photo that I would make. One would be exposed for the sky while another was exposed for the buildings. After some thought I decided on a workflow that included the following:
- Import into Lightroom for basic adjustments and then import both photos into Photoshop as layers
- Convert the building layer that was bathed in the orange glow to black and white and do finished contrast adjustments
- Adjust the sky layer with the Milky way
- Create a mask to bring the sky into the black and white building layer
- Create a 50% grey layer with Soft Light blend mode and select a brown color and paint the buildings and adjust opacity until it looks right
- Create a 50% grey layer with Soft Light blend mode and select a drab green color and paint the sagebrush and adjust opacity until it looks right
- Make final separate adjustments of separate layers
- Merge layers and create final adjustments
- Size and sharpen
It’s always my goal to get my photos in a single exposure and I try my best to make my processing as simple as possible to get the best effect but there are times when one must push the envelope and salvage a long drive to the middle of nowhere. In this case my creativity and knowledge of Photoshop was tested. Although it wasn’t exactly what I went for I think that the final images were salvaged, at the very least.


